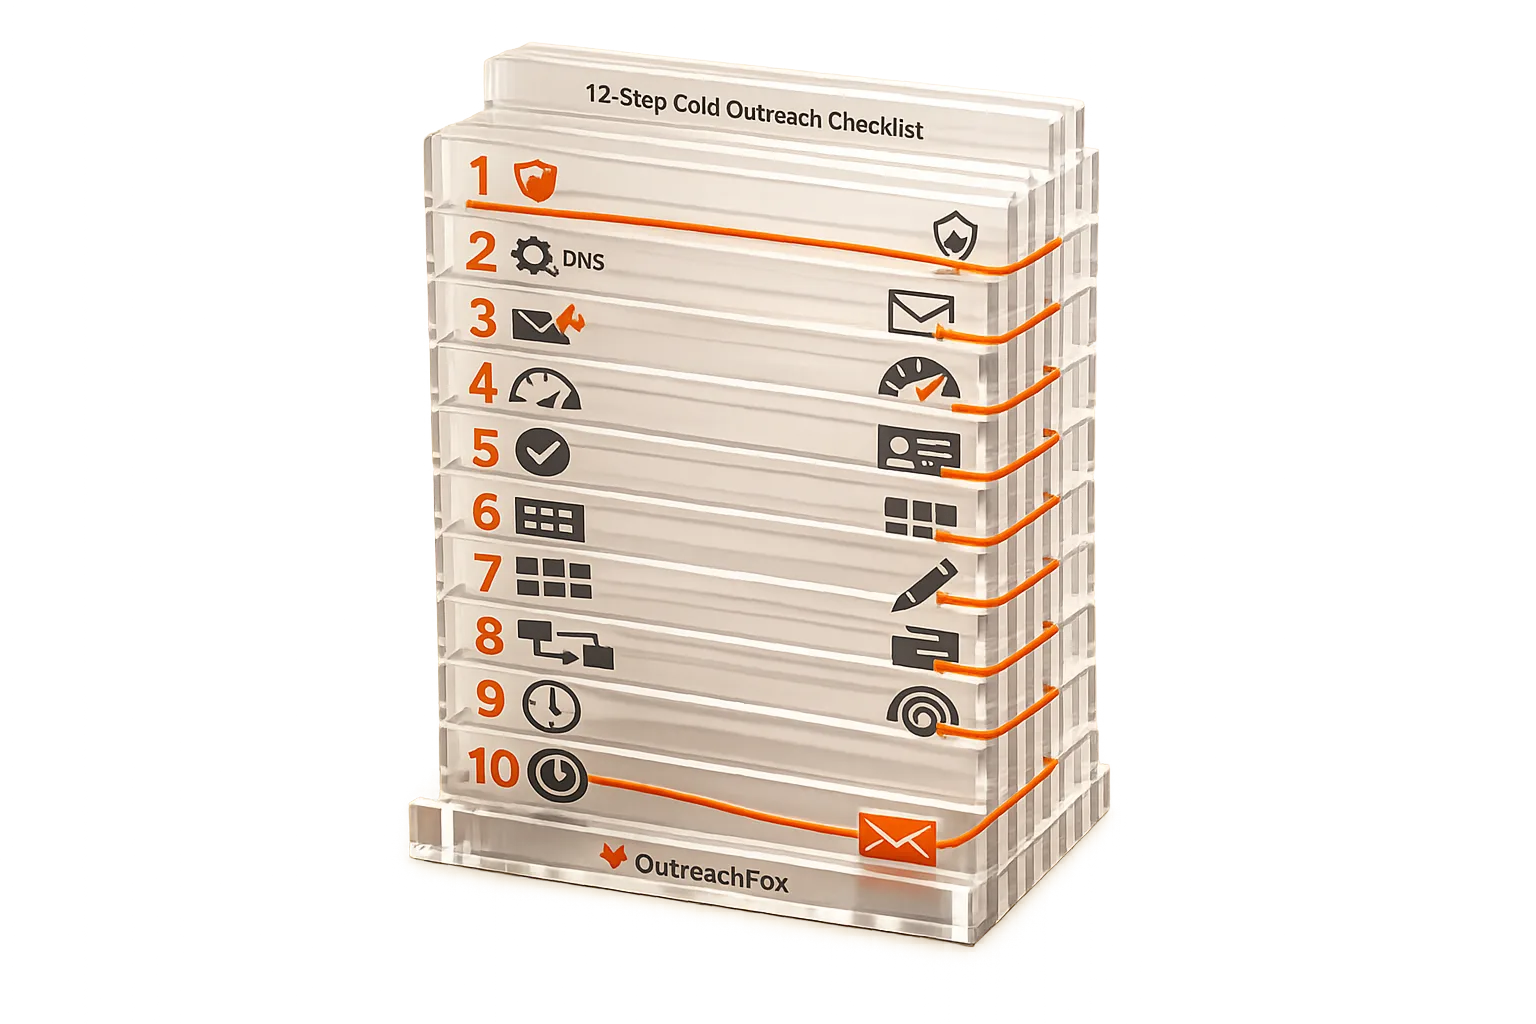
This 12-step checklist covers email infrastructure setup, data verification, and sequence design to ensure B2B cold outreach reaches inboxes and generates consistent replies.
- Set up dedicated domains and configure SPF, DKIM, DMARC authentication to protect deliverability
- Verify email lists to keep bounce rates under 2% and maintain sender reputation
- Warm up mailboxes for at least 14 days before sending campaigns at scale
- Enrich leads with firmographics and intent data for targeted, personalized outreach
- Run pilot campaigns with 20-50 contacts to test sequences before full launch
- Gradually increase sending volume across multiple mailboxes to avoid spam filters
B2B Cold Outreach Checklist: 12 Steps Before You Send
B2B cold outreach can fail if your email infrastructure isn’t properly set up. Misconfigured domains, unverified email lists, or skipping essential steps like warming up mailboxes can lead to emails landing in spam, high bounce rates, or even blacklisting. This checklist ensures your outreach reaches inboxes and gets responses.
Key Steps to Follow:
- Set Clear Goals & Metrics: Define measurable objectives like reply rates or meetings booked.
- Identify Your ICP: Pinpoint your ideal customer profile, including roles and intent signals.
- Use Reliable Data: Source verified email lists to avoid bounces and protect your reputation.
- Set Up Dedicated Domains: Use separate domains and subdomains to shield your main domain.
- Configure SPF/DKIM/DMARC: Authenticate emails to improve deliverability.
- Warm Up Mailboxes: Simulate genuine activity for at least 14 days to build trust.
- Verify Email Lists: Keep bounce rates under 2% with tools that clean your data.
- Enrich Lead Data: Add firmographics and intent data for personalized outreach.
- Attach Multichannel Identifiers: Use LinkedIn profiles and other channels for better engagement.
- Design Targeted Sequences: Create 3–5 step email campaigns with LinkedIn touches.
- Set Sending Limits: Gradually increase email volume to avoid spam filters.
- Run a Pilot Campaign: Test with a small group and refine based on metrics.
Why It Matters:
Each step builds a solid foundation for successful cold outreach. Skipping any of these can harm your sender reputation or waste your efforts. Following this checklist can boost reply rates from as low as 2% to over 14% in just weeks, as proven by companies like PulseLabs.
This process isn’t just about sending emails - it’s about creating a repeatable, measurable system that delivers consistent results.
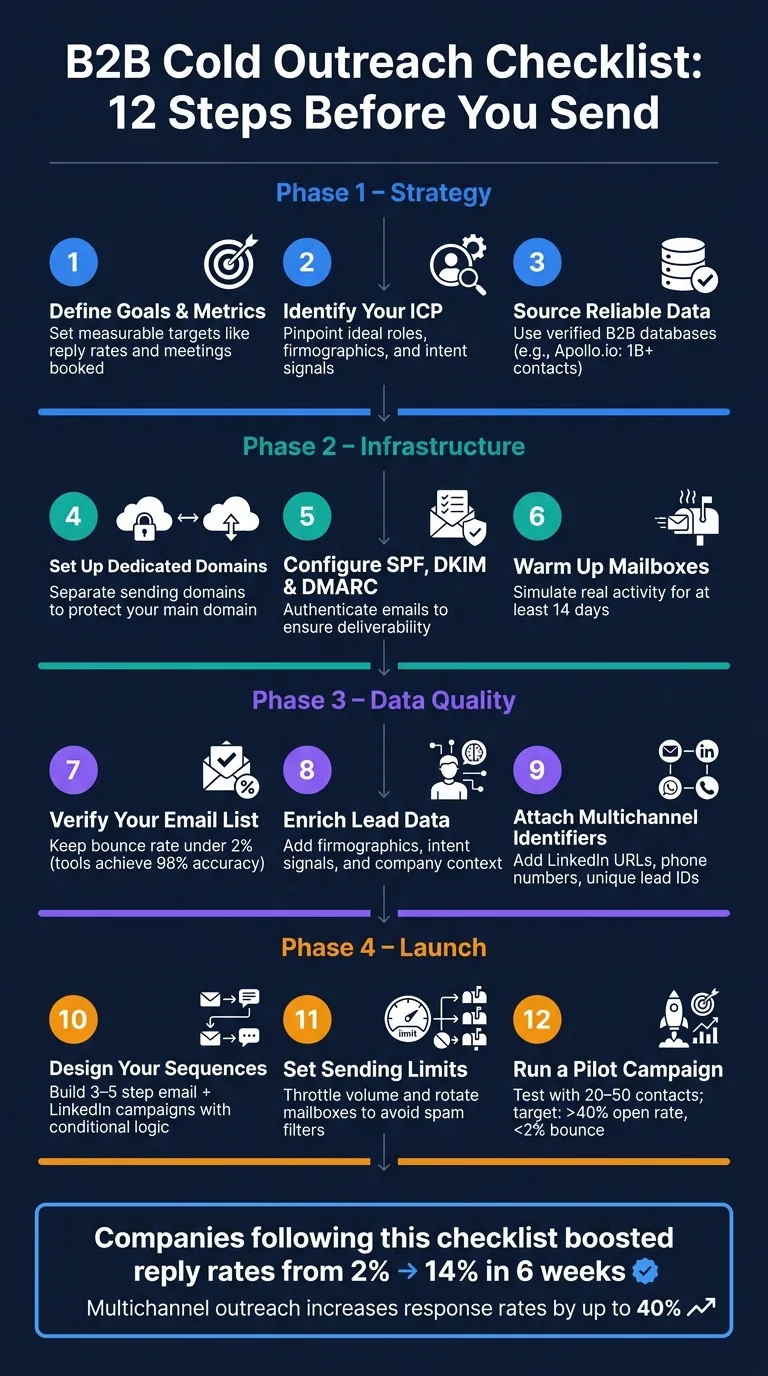
Steps 1-3: Campaign Goals, ICP, and Data Sources
Define Your Campaign Goals and Metrics
Before writing a single word of copy, you need to pin down what success looks like. Avoid generic goals like "get more leads." Instead, focus on a primary objective - whether that’s booking meetings, generating pipeline, or hitting a specific quota. Attach concrete numbers to these goals to make them measurable. This clarity will be invaluable later when you’re testing and fine-tuning your sequences.
To gauge your campaign's effectiveness, track key metrics across three categories: deliverability, engagement, and conversion. Here’s a quick breakdown:
| KPI Category | Metric | What It Tells You |
|---|---|---|
| Deliverability | Inbox Placement Rate | Are your emails landing in inboxes rather than spam? |
| Deliverability | Bounce Rate | Is your contact list clean and up-to-date? |
| Engagement | Open Rate | Are your subject lines grabbing attention? |
| Engagement | Reply Rate | Is your message resonating with recipients? |
| Conversion | Meetings Booked | Are you driving meaningful business outcomes? |
| Conversion | Pipeline Value ($) | What’s the financial return on your outreach efforts? |
One often-overlooked but powerful metric is reply sentiment. It’s not just about how many people reply - it’s about understanding whether those replies are positive or negative. This distinction can help you separate uninterested responses from genuine opportunities, giving you deeper insights into your campaign’s performance.
Identify Your Ideal Customer Profile (ICP) and Personas
Your ICP is the backbone of your campaign. Start with firmographics like industry, company size, and location. Then, zoom in on the specific buyer role - the person who feels the pain point you solve and has the authority to act on it.
But great targeting goes beyond basic demographics. It’s all about intent signals. These signals tell you when someone is actively experiencing a problem you can solve. For example, you might look for signs like recent hiring in a relevant department, a new tech stack implementation, or even a LinkedIn post hinting at a challenge your solution addresses.
Here’s a real-world example: Jonathan Chemouny, GTM at ElevenLabs, used multichannel tactics and intent signals to prioritize outreach. By doing so, he drove 35% of the company’s total outbound pipeline in 2026. That kind of precision isn’t about casting a wide net - it’s about reaching the right person at exactly the right time.
Use Reliable and Compliant Data Sources
The quality of your contact data can make or break your campaign. Poor-quality lists can lead to high bounce rates, which harm your sender reputation and email deliverability.
Stick with trusted B2B data providers like Apollo.io or Seamless.AI. These platforms offer massive, regularly updated databases - Apollo.io, for instance, boasts over 1 billion contacts - and include built-in tools to verify email addresses and reduce bounces. Even with these resources, it’s smart to run your list through a dedicated email verification tool before uploading it to your sending platform. Top-tier tools can achieve up to 98% accuracy, keeping your bounce rate low and your domain reputation intact.
A clean, verified list isn’t just good practice - it’s essential for protecting the email infrastructure you’ll set up in the next steps. With clear goals, a well-defined ICP, and reliable data in hand, you’re ready to move forward with confidence.
Steps 4-6: Domain and Mailbox Infrastructure Setup
Set Up Dedicated Domains and Subdomains
When running outreach campaigns, always use dedicated domains to safeguard your primary domain. Why? If a campaign triggers spam complaints or ends up on a blacklist, your main domain - used for client communications, invoicing, and internal operations - stays protected.
To keep things natural and credible in the eyes of email service providers (ESPs), distribute your sending volume across multiple domains and mailboxes. For instance, instead of sending 500 emails from one mailbox, spread them out: 50 emails per mailbox, using 10 mailboxes across 3 domains. This approach mimics organic email activity.
Configure SPF, DKIM, and DMARC Records
Once your domains are ready, it’s time to set up SPF, DKIM, and DMARC records. These are essential for email authentication and ensuring your messages reach their destination:
- SPF: Authorizes specific mail servers to send emails on behalf of your domain.
- DKIM: Adds a digital signature to your emails, confirming they haven’t been altered during delivery.
- DMARC: Works alongside SPF and DKIM, providing instructions to receiving servers on how to handle emails that fail authentication.
To double-check that everything is configured correctly, tools like MXToolbox are invaluable. Some outreach platforms, like OutreachFox, streamline this process by automating the setup during onboarding. This reduces the chances of errors, which some email marketers call "deliverability roulette" due to the unpredictability of manual DNS setups.
Once authentication is complete, the next step is to establish trust with a proper warmup process.
Warm Up Domains and Mailboxes
A warmup period of at least 14 days is crucial for building a solid sending reputation. The key is to use genuine inbox interactions rather than relying on automated bots, which can come across as artificial. Peer-to-peer inbox networks simulate real email activity, creating a more believable warmup process.
Platforms like OutreachFox even offer pre-warmed mailboxes, significantly reducing the time it takes to get started. Many teams using this feature report achieving inbox placement rates of 98–99% right out of the gate.
"The unlimited email warmup feature alone justified the switch. Our inbox placement improved and bounce rates dropped noticeably." - Marcus Lee, Outbound Lead, PipelineForge
After the warmup, it’s important to continuously monitor your domain reputation. Even a small increase in bounce or complaint rates can harm your sender score. With this solid foundation in place, your infrastructure is ready for the next steps.
The Ultimate Guide to Cold Emailing in B2B Sales (Step-by-Step)
Steps 7-9: Data Quality and Lead Enrichment
After setting up a solid infrastructure, the next step is making sure your data is accurate and actionable. Even the most advanced domain setup won't deliver results if you're working with outdated or incomplete records.
Verify and Clean Your Email List
Before sending out any emails, it's essential to verify your entire list. The goal? Keep your bounce rate below 2%. A good email verifier can identify and remove invalid addresses, disposable emails, and catch-all domains that can quietly damage your deliverability over time.
For example, tools like Snov.io’s email verifier achieve a 98% accuracy rate by using advanced methods like graylisting bypass, which provides a more precise read of mail server responses. Platforms such as OutreachFox even integrate email verification directly into their workflows, eliminating the need for separate tools. Once your list is clean, you can take it a step further by enriching each record with additional firmographic and intent data.
Enrich Leads with Firmographics and Intent Data
A lead isn’t just an email address - it’s a person or company with context. Adding details like job title, company size, revenue, and industry can make your outreach far more effective. Even better, incorporating intent data - such as recent funding announcements, new executive hires, or changes in their tech stack - can help you identify when a prospect is most likely to engage.
Timing is everything. Reaching out when a company is in motion, based on these intent signals, can yield far better results than using a generic cold list. OutreachFox, for instance, uses waterfall enrichment from over 50 data providers to ensure your leads are complete and actionable.
"The messages never look generic; they always read like I've done my homework, and that makes a huge difference." - Louise H., Senior BDR, Crystal Intelligence
With this enriched data, the next step is to connect the dots across multiple channels.
Attach Multichannel Identifiers
To maximize your outreach, you’ll need more than just an email address. Attach LinkedIn profile URLs, social media handles, and a unique lead ID to each record. This ensures you can reach your prospects wherever they are and tie their interactions back to your CRM for a seamless experience.
Multichannel outreach has been shown to increase response rates by up to 40%. A unique lead ID also ensures consistent opt-out management, so if a prospect unsubscribes on one channel, they’re automatically removed from all others.
With your contacts verified, enriched, and connected across multiple platforms, you’re ready to create highly targeted outreach campaigns.
Steps 10-12: Sequence Design and Pre-Launch Testing
Now’s the time to build and fine-tune your outreach sequences before scaling up. This step ensures your setup - from strategy to execution - is ready to deliver results.
Design Your Email and LinkedIn Sequences
Start with a soft introduction, like viewing a prospect’s LinkedIn profile or engaging with a post a day or two before sending your first email. This way, your name feels familiar when your message shows up. After that, create a 3–5 step email sequence, spacing each touchpoint by 2–5 business days.
To keep things relevant, use conditional logic. For example, adjust follow-ups based on how prospects interact with your outreach - whether they open an email, click a link, or accept a LinkedIn connection request. This approach makes your messaging feel personal without requiring constant manual tweaks.
"Since we implemented Snov.io LinkedIn automation, the number of accepted connection requests and the initial response rate increased." - Chinmay Chandgude, Head of Sales, Latent
You can also use AI-generated first lines to personalize messages at scale. These tools can pull insights from a contact’s LinkedIn activity, recent company updates, or website content to craft tailored icebreakers. Research shows that AI-personalized outreach can yield reply rates as high as 65%.
Once your sequence is ready, focus on maintaining email deliverability by controlling your sending behavior.
Set Sending Limits and Throttling Rules
Sending too many emails too quickly can trip spam filters. To avoid this, start with a low volume and gradually increase as your sender reputation improves. Set daily sending limits and distribute emails across multiple mailboxes and domains to spread the workload.
Timing also matters. Schedule emails to align with your recipient’s local business hours. For example, an email intended for a Tuesday morning reader in Chicago shouldn’t be sent at midnight. Staggering send times helps mimic natural human behavior and reduces the risk of spam flags.
"Reply offered us a platform where we're sure that the right emails go out at the right time. It helped us get reply rates of over 65%." - Sjors Mahler, Sales & Growth Lead, pr.co
Run a Pilot Campaign and Review Results
Before launching at scale, test your approach with a smaller audience. Send a pilot campaign to 20–50 contacts who closely match your target personas. This isn’t just a technical test - it’s your chance to ensure your messaging resonates.
During the pilot, monitor these key metrics:
| Metric | What It Tells You | Target Benchmark |
|---|---|---|
| Open Rate | Subject line effectiveness and inbox placement | 40%–70%+ |
| Reply Rate | Message relevance and clarity of your call-to-action | 8%–25% |
| Bounce Rate | Data quality and list cleanliness | < 2% |
| Inbox Placement | Effectiveness of your email infrastructure setup | ~99% |
If your bounce rate exceeds 2%, re-verify your contact list. For low open rates, try experimenting with new subject lines. Once your metrics hit the benchmarks, you’re ready to scale. For example, PulseLabs used this iterative approach to boost their reply rate from 2% to 14% in just six weeks, all while maintaining a 99% inbox placement across 120,000 monthly sends.
12-Step Checklist Summary
Before launching your campaign, double-check this 12-step checklist. Each step plays a vital role, and skipping even one could quietly derail the entire effort.
| Step | Action | Why It Matters |
|---|---|---|
| 1. Define Goals & Metrics | Set clear goals like open rates, reply rates, or meetings booked | Provides a baseline to measure success and identify issues early |
| 2. Identify Your ICP | Use filters and AI tools to pinpoint your Ideal Customer Profile (ICP), including job titles and company profiles | Ensures precise targeting, reducing wasted outreach |
| 3. Source Reliable Data | Use verified B2B databases with intent signals like hiring activity or tech stack changes | Bad data can ruin campaigns before they even start |
| 4. Set Up Dedicated Domains | Create separate sending domains and subdomains | Protects your main corporate domain from being flagged as spam |
| 5. Configure SPF, DKIM & DMARC | Ensure these DNS records are properly configured | Confirms your sender identity and prevents spoofing |
| 6. Warm Up Mailboxes | Run an automated warm-up for at least 14 days prior to sending | Builds sender reputation, improving inbox placement |
| 7. Verify Your Email List | Use real-time tools to verify emails and keep your bounce rate under 2% | Maintains a healthy sender score as you scale up |
| 8. Enrich Lead Data | Add details like firmographics, LinkedIn profiles, and intent signals | Enables personalization without manual effort |
| 9. Attach Multichannel Identifiers | Gather LinkedIn URLs, phone numbers, or other contact details | Facilitates outreach across email, LinkedIn, and phone for better results |
| 10. Design Your Sequences | Create a 3–5 step email sequence with LinkedIn touches and conditional logic | Keeps messaging relevant based on prospect responses |
| 11. Set Sending Limits | Limit daily sends, throttle email volume, and rotate mailboxes | Mimics human behavior to avoid spam filters |
| 12. Run a Pilot Campaign | Test with 20–50 contacts and analyze metrics like open, reply, and bounce rates | Ensures everything is working before scaling up |
These steps lay the groundwork for a successful campaign. Multichannel strategies can increase response rates by as much as 40%. Following this checklist ensures your campaign is ready to scale effectively.
Conclusion: Build a Repeatable Cold Outreach Process
Cold outreach often falls short when it's done inconsistently. By following this checklist as your standard process, you can achieve steady, compounding results over time.
A structured approach to infrastructure and data quality is the backbone of successful outreach. The gap between hit-or-miss efforts and a dependable pipeline lies in having a clear process. Teams that focus on standardizing their infrastructure, verifying data, and designing sequences avoid starting from scratch with every campaign. This consistency delivers measurable results - up to 50% of closed deals in high-performing organizations are directly linked to standardized outreach campaigns.
The efficiency benefits are also hard to ignore. Automating tasks like mailbox warmup and list verification saves each salesperson about 7 hours a week, allowing them to focus on closing deals. Yannis Moati, CEO of HotelsByDay, highlights this advantage:
"We saved 7 hrs/week for each salesperson, 50% of deals closed are now following a Reply campaign."
This streamlined approach doesn't just improve immediate outcomes - it also builds better habits for the long term.
Each new campaign offers a chance to revisit and refine this checklist. Keep your DNS records in order, ensure warmups are active, and refresh your data sources regularly. Neglecting these steps can quietly erode your deliverability, and before you realize it, weeks of progress can be undone.
The goal is simple: establish a repeatable process that delivers consistent, predictable results. By sticking to this framework, you can keep your pipeline running smoothly and your outreach efforts on track.
Frequently asked questions
How long should I warm up my mailboxes before starting cold outreach campaigns?+
You should warm up your mailboxes for at least 14 days before launching cold outreach campaigns. The warmup process should use genuine inbox interactions through peer-to-peer networks rather than automated bots to simulate real email activity and build sender reputation with email service providers.
Why do I need dedicated domains for cold outreach instead of using my main company domain?+
Using dedicated domains protects your primary corporate domain from spam complaints and potential blacklisting. If your outreach campaign triggers spam filters or gets blacklisted, your main domain used for client communications, invoicing, and internal operations remains safe and unaffected.
What bounce rate should I aim for in my cold email campaigns?+
You should keep your bounce rate below 2% to maintain healthy email deliverability and sender reputation. If your bounce rate exceeds 2%, you need to re-verify your email list using real-time verification tools to remove invalid addresses, disposable emails, and catch-all domains before continuing your campaign.
How many steps should my cold email sequence include?+
Your email sequence should include 3-5 steps, with each touchpoint spaced 2-5 business days apart. The sequence should incorporate both email and LinkedIn touches, and use conditional logic to adjust follow-ups based on prospect interactions like opens, clicks, or connection requests.
What are SPF, DKIM, and DMARC records and why are they important?+
SPF authorizes specific mail servers to send emails on your domain's behalf, DKIM adds a digital signature confirming emails haven't been altered, and DMARC provides instructions for handling failed authentication. These DNS records are essential for email authentication and ensuring your messages reach inboxes instead of spam folders.
How should I test my cold outreach campaign before scaling up?+
Run a pilot campaign with 20-50 contacts who closely match your target personas. Monitor key metrics including open rate (target 40-70%+), reply rate (target 8-25%), bounce rate (target <2%), and inbox placement (target ~99%). Only scale up once these benchmarks are met and your messaging resonates with the test audience.
What are intent signals and how do they improve cold outreach targeting?+
Intent signals are indicators that a company is actively experiencing a problem you can solve, such as recent hiring in relevant departments, new tech stack implementations, or LinkedIn posts hinting at challenges. Using these signals helps you identify prospects at the right time, significantly improving response rates compared to generic cold lists.